How To Take A Screenshot On Samsung Galaxy A53 5G (5 Methods)
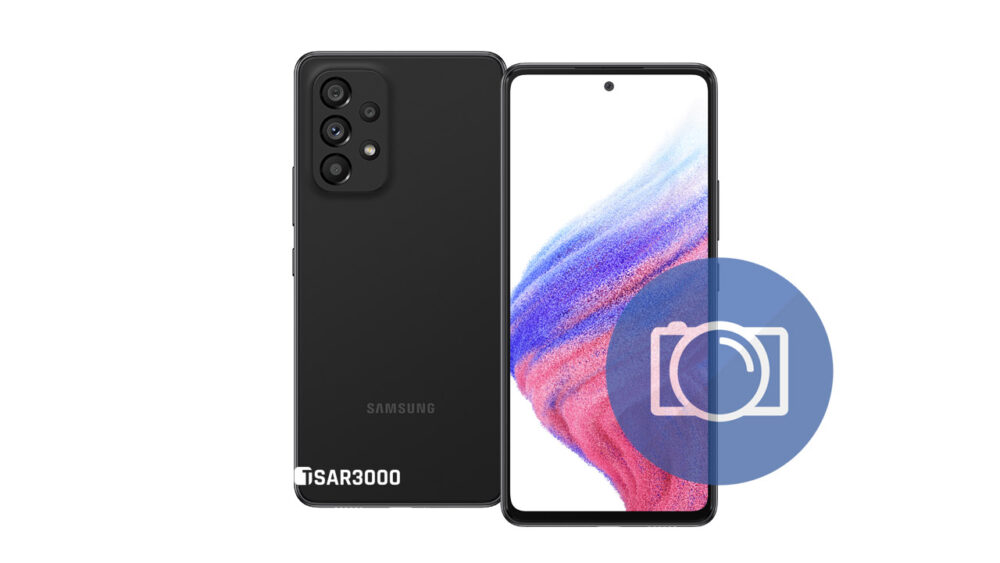
Taking a screenshot on Samsung Galaxy A53 5G is effortless. Even You do not need to use or install any additional application on your Samsung phone. You can capture a screenshot on this Samsung smartphone via five methods, And this Guide will show you how to use these five methods.
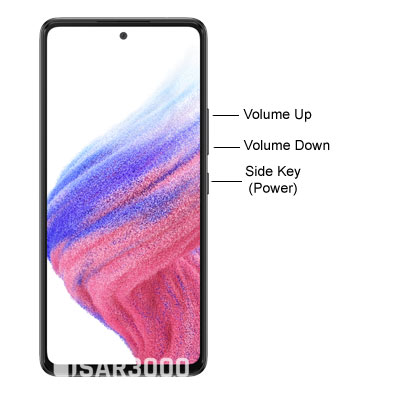
To capture a screenshot in the Galaxy A53 5G Press and Release (At the same time) the Volume Down button + Side Key (Power button). Or Swipe the edge of your hand Horizontally to the right or left across the screen. The captured screenshot will be saved in Gallery App > Screenshots folder.
- Button Combinations.
- Palm Swipe to Capture.
- Take A Scrolling Screenshot.
- Using the Edge Panel.
- Using Your Voice.
- Screenshot Settings.
How To Take A Screenshot on Samsung Galaxy A53 5G using its Hardware Buttons:
Time needed: 2 minutes
Follow these steps to capture a screenshot in your Samsung Galaxy device:
- Step 1:
Get the content you want to capture ready on your phone’s screen (webpage, Game score, WhatsApp chat…etc).
- Step 2:
Press and Release the Volume Down button and the Side Key (Power) at the same time, And you’ll hear the camera shutter sound and see a short flashing animation on the phone’s screen.

- Step 3:
The operating system of your phone saves the captured screenshot in the Screenshots folder. To see the screenshot photo go to Gallery App > Screenshots. Alternatively, you can use My Files app to open the Screenshots folder.
- Step 4:
Once you find the screenshot photo, You can share it with your friends and family via any Social application, Email, Or send it to another device via a Bluetooth or WiFi connection. Alternatively, any sharing options available on your Samsung Galaxy device.
How To Take A Screenshot on Samsung Galaxy A53 5G by Swiping the Screen:
Step 1: First you have to check if the “Palm Swipe to Capture” feature is enabled on your Galaxy A53 5G. Go to Settings > Advanced Features > Motions and Gestures, and make sure it is enabled.
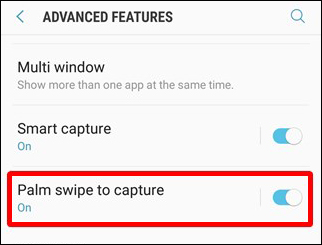
Step 2: Get the content you want to capture ready on your phone’s screen (webpage, Game score, WhatsApp chat…etc).
Step 3: Place the side of the Palm of your hand on the edge of your phone’s screen.
Step 4: Swipe your hand Horizontally from this edge to the other one. However, Keep your palm’s side touching the screen. You’ll hear the camera shutter sound and see a short flashing animation on the phone’s screen.
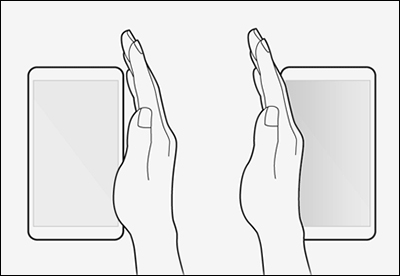
Step 5: The operating system of your Samsung device saves the captured screenshot in the Screenshots folder. To see the screenshot photo go to Gallery App > Screenshots. Alternatively, you can use My Files app to open the Screenshots folder.
Step 6: Once you find the screenshot photo, You can share it with your friends and family via any Social application, Email, Or send it to another device via a Bluetooth or WiFi connection. Alternatively, any sharing options available on your Samsung Galaxy A53 5G.
How To Take A Scrolling Screenshot on Samsung Galaxy A53 5G:
An amazing feature present on most new Samsung Galaxy models is “Scroll Capture” (Also known as a Long Screenshot). This option allows you to take multiple screenshots of a page when it’s too long and you need all the information present therein.
- To perform this capture, you ought to do the following steps:
- Step 1: Go over to the screen that you wish to capture.
- Step 2: Press and Release the Side Key / Power and Volume Down buttons at the same time (in the same manner described in the first method).
- Step 3: Wait until the Smart capture menu appears on the bottom of the screen
 and tap the “Scroll capture” icon, identified by two downward arrows.
 - Step 4: Tap this icon as many times as you need until you reach the desired spot.
- Step 5: Tap the hashtag button (#) to add tags to your screenshots (optional).
How To Capture a Screenshot on the Galaxy A53 using the Edge Panel:
The Edge Panel is only available on certain Samsung Galaxy phones, You can enable this functionality by going over to Settings > Display > Edge Panels > On. Then, turn on the Smart Select panel.

As you swipe the right edge of the screen, you can now access the Smart Select panel. From there, choose either Rectangle or Oval and select the area you wish to capture by dragging your finger. After that, tap Done and then Save.
How To Capture a Screenshot on your Galaxy A53 Using Your Voice:
Samsung includes its own voice assistant – namely, Bixby – through which you may also perform various commands, including taking screenshots.
If you have the Bixby enabled, you can press the dedicated Bixby button or simply say “Hi Bixby, take a screenshot”. Bixby will then activate the command and capture a screenshot of whatever is on your screen at that given moment.
You may also use the Google Assistant for this purpose. You can likewise summon the assistant by saying “Hey Google” and then tell it to take the screenshot.
You could also command more complex tasks. For example, you can try telling either one of these assistants to “take a screenshot and share on Facebook”.
How to Change the Screenshot Settings in Galaxy A53 5G:
- Step 1: From the Home screen, Tap on the Settings icon to access your device settings app.
- Step 2: Scroll down to find the Advanced features section and tap on it.
- Step 3: Look for the Screenshots and Screen Recorder option and tap on it.
- Step 4: You will get the following screenshots settings:
- Screenshot Toolbar: To show additional options after you take a screenshot on your device.
- Hide Status and Navigation bars: Use this option if you want to hide the Status and Navigation bars, So they will not show in the taken screenshots.
- Delete Shared Screenshots: This option will automatically delete screenshots after sharing them through the screenshot toolbar.
- Screenshot Format: This option will let you change the file type of the screenshot. You can save them as JPG or PNG files.
Notices:
- The resolution of the captured screenshots is the same as your Samsung device screen resolution. The Samsung Galaxy A53 5G has FHD+ display with 1080 x 2400 Pixels resolution.
- You can edit the screenshot photos the same way you do with any other photos and images.
- You can not hide the Screenshots album (folder) because it is created by default like the Camera album.








Leave a Response